
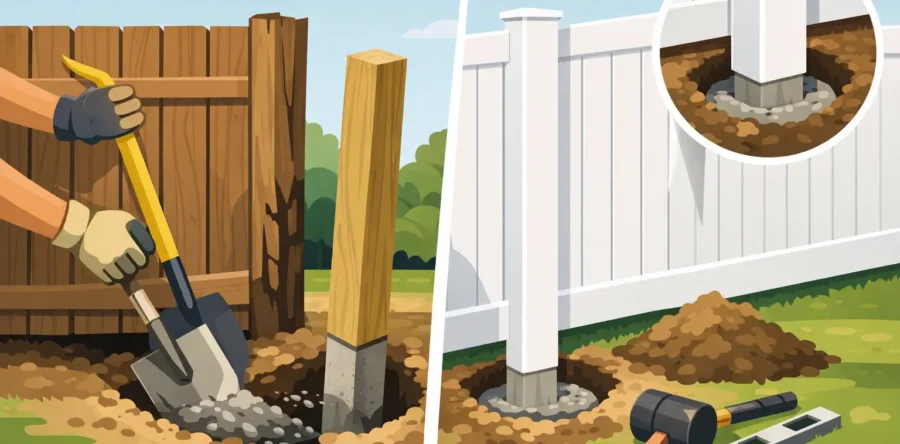
A fence can look like it needs total replacement when the real problem is only one failed support. A leaning section, loose boards, or a post that moves in the ground can often be corrected without tearing out the entire run. Knowing how to replace fence posts properly helps you protect the investment you have already made - and avoid the shortcut repairs that fail again after the next hard rain or Santa Ana wind.
The work is physical, but the bigger issue is structural. A replacement post must line up with the existing fence, reach sound soil, resist movement, and support the weight placed on it. If the old post failed because of rot, poor drainage, shallow concrete, or undersized materials, simply placing another wood post in the same conditions repeats the problem.
Start by Finding Out Why the Post Failed
Before removing anything, inspect the entire fence line. Wood posts commonly fail at or just below ground level, where moisture, soil organisms, and trapped water do their work out of sight. Push on the post from several directions. If the top moves while the base feels soft or broken, the post itself is likely compromised. If the full section shifts together, nearby posts or rails may also be carrying damage.
Look closely at the concrete collar, if there is one. Cracked concrete does not always mean the post is bad, but a loose collar that rocks in the soil is a warning sign. In Southern California, dry soil can shrink away from posts, while seasonal rain can expose poorly compacted backfill. Coastal air, irrigation overspray, and landscape drainage can all shorten the life of untreated or low-grade materials.
Also check whether the fence is being pushed out of line by roots, a slope, heavy vegetation, or a neighboring grade change. Replacing a post without addressing that pressure may straighten the fence temporarily, but it will not solve the reason it moved.
Decide Whether One Post Is Really the Right Repair
A single-post repair makes sense when the surrounding posts are solid, the rails are straight, and the fence materials still have useful life left. It is especially practical when one wood post has rotted while the rest of the fence remains stable.
Replacement becomes less efficient when multiple posts are soft, the fence has widespread warping, or every section is leaning. In that situation, labor spent carefully dismantling and reconnecting aging material can approach the cost of a properly planned replacement. Vinyl, wood, chain-link, and large-property perimeter systems each have different repair limits. The right answer depends on the material, access, terrain, and how long you expect the fence to perform.
Property lines are another reason to slow down. If the fence sits close to a boundary, confirm its placement before pulling posts or setting new ones. A repair should not create a costly disagreement with a neighbor or conflict with local requirements.
How to Replace Fence Posts Step by Step
The basic process is straightforward, but accuracy matters at every stage. Work carefully, wear eye and hand protection, and call before you dig. Underground utility lines can be present even in areas that appear clear.
Support the Fence Before Removing the Old Post
Do not pull a failed post while the fence section is hanging freely. Use temporary bracing to hold the rails and panels at their correct height and alignment. A pair of sturdy boards secured on either side of the damaged area can keep the section from sagging, twisting, or putting stress on adjacent posts.
If the fence is badly leaned, use a string line along the top or face of the fence to establish the proper line before bracing it. This creates a reference point for the replacement post. Trying to judge alignment by eye is how small errors become obvious waves down a long fence run.
Remove fasteners, rail connections, or panel hardware only as needed to free the damaged post. Save reusable components, but do not reuse corroded fasteners or cracked brackets just because they are already on hand.
Remove the Post and Its Old Footing
Dig around the existing concrete footing rather than trying to yank the post out blindly. A digging bar, shovel, and reciprocating saw may be useful depending on the condition of the post and the size of the footing. In many cases, the old wood post breaks away from its concrete, leaving the footing buried in place.
That old concrete should usually be removed if it prevents proper placement of the new post or leaves the new support too close to the old failure point. Breaking it apart and hauling it away takes effort, but setting a post beside a decaying stump or undersized footing can create an off-center repair that looks poor and performs worse.
Excavate a hole that is appropriately sized for the fence height, post type, soil conditions, and wind exposure. There is no one-depth rule that fits every property. Taller privacy fences, exposed hillside locations, and heavier materials need more support than a short decorative run in protected ground. The hole should be deep enough to resist leverage and wide enough to allow concrete placement around the post.
Choose a Post That Solves the Original Problem
For wood fencing, a properly rated pressure-treated post can be a practical choice, but quality varies. The portion placed below grade must be suitable for ground contact. Above-ground lumber treatment is not the same thing, and using the wrong product can lead to early rot.
For homeowners who want to reduce the risk of future post failure, steel Postmaster posts are a strong option behind wood fencing. They provide a durable structural core while allowing the finished fence to retain a traditional wood appearance. Unlike wood, steel does not rot at the soil line, and high-grade Postmaster posts can provide long-term support where wind, moisture, and fence weight challenge ordinary lumber.
Vinyl fencing requires compatible posts, reinforcement, and installation methods. Do not assume that a wood-post repair can be adapted to vinyl without checking the system requirements. A post that is too narrow, poorly reinforced, or improperly connected can affect both the appearance and long-term stability of the fence.
Set the New Post Plumb, Aligned, and Properly Supported
Place the new post in the center of the hole and use a level on two adjacent sides to make it plumb. Check it against the string line and the height of neighboring posts. If the fence steps with the slope, match that existing layout rather than forcing the new post to a level height that disrupts the pattern.
For a concrete-set post, place concrete around the post while maintaining alignment. Do not fill the hole and walk away. Recheck plumb as you add material, because the post can shift under the weight of wet concrete. Shape the top of the concrete so water sheds away from the post instead of pooling at the base.
Some fencing systems use compacted gravel or other installation methods based on the post material and manufacturer requirements. The correct approach depends on the system. What matters is that the post is firmly supported, drainage is considered, and the repair is built for the actual conditions on the property.
Brace the post until the setting material has gained enough strength. Reattaching rails or panels too soon can pull a newly placed post out of alignment. Waiting is not wasted time - it is what keeps a straight repair straight.
Reconnect the Fence and Inspect the Full Run
Once the post is stable, reconnect rails, panels, and hardware at the original height. Use exterior-rated fasteners suited to the material. Check rail ends for rot before fastening them to a new post. A new support cannot compensate for a rail that has already lost its strength.
Step back and inspect the fence from both directions. The top line should be consistent, spacing should look intentional, and the repaired section should not place unusual tension on the posts beside it. Test the post with firm pressure after the appropriate curing period. It should feel solid, not loose or springy.
Clean up excavated soil, old concrete, broken lumber, and fasteners. A professional repair includes a clean job site, not a pile of debris left beside the fence line.
When a Professional Fence Repair Is the Better Value
Replacing one accessible post can be a manageable project for an experienced homeowner. It becomes more complicated when the fence is tall, heavily damaged, located on a slope, close to utilities, tied into masonry, or part of a long commercial, ranch, or estate perimeter. Those conditions call for more than a quick patch.
A licensed fencing contractor can assess whether the failure is isolated, recommend materials that fit the fence and site, and provide a written scope before work begins. For Ventura County and surrounding Southern California properties, All Season Fencing can evaluate aging posts, unstable sections, and full replacement options with direct, practical guidance.
The best repair is not the fastest one. It is the one that leaves the fence straight, secure, and built with materials that will not send you back to the same problem a season from now.